Your website goes live once your domain points to us. The simplest way is to change your domain's nameservers at the company where you registered it.
Our nameservers
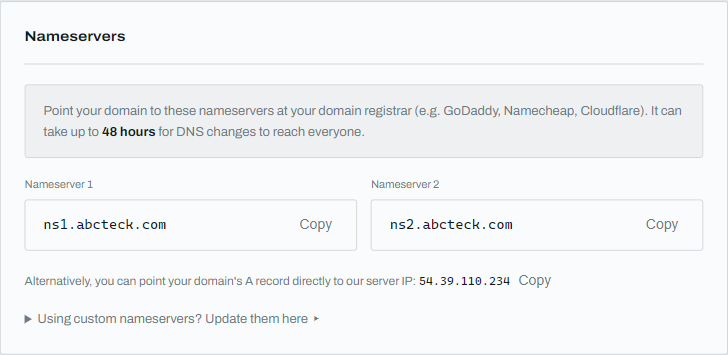
Add your domain in your dashboard first. The domain page then shows the two values to use, each with a Copy button.
ns1.abcteck.comns2.abcteck.com
Change them at GoDaddy
- Sign in to GoDaddy and open your Domain Portfolio.
- Click your domain, then open the DNS tab.
- Find Nameservers and click Change Nameservers.
- Choose the option to enter your own nameservers.
- Remove the existing entries. Enter
ns1.abcteck.comandns2.abcteck.com. - Save, and confirm if GoDaddy asks.
GoDaddy changes its screens from time to time, so button names may differ a little. The idea is always the same: find the nameserver setting and replace the values.
Other registrars
The same two values go in at any registrar. Look for a setting called Nameservers, DNS servers or Custom DNS, and choose the option for custom nameservers.
Wait, then check
DNS changes can take up to 48 hours to reach everyone, although most finish much sooner. During that time some visitors may still see your old site. To check, open Command Prompt or Terminal and run:
nslookup -type=NS yourdomain.comWhen the answer lists ns1.abcteck.com, the change has arrived. Free SSL is added automatically once your domain points to us. See Free SSL certificates.
Already have email on this domain?
Changing nameservers moves all of your domain's DNS settings. If your email is hosted somewhere else, such as Google Workspace, add its records in your dashboard before you switch, or your email may stop arriving. If you are not sure, open a support ticket first.
The other option: an A record
The domain page also shows our server address. If you want to keep your DNS at your registrar, you can point the domain's A record to that address instead. This suits people who already manage DNS. If this is your first site, use the nameservers.